- clean/organize linen closet: check!
- clean/organize craft room: check!
- complete my wedding scrapbook album: check!
- clean/organize the room that houses a spare bed and my clothes:
NOT finished! I still have a small amount of time for this; although, I'm not sure I'll get it done considering we're having a small gatherieng for the Lions' game tomorrow.check! - purchase/hang a coat rack near the back door:
purchased, NOT yet hung! As long as Rich finds the motivation, this project should get finished tomorrow.check! - complete a craft project found on Pinterest: check!
To complete this project, you'll need:
- 4 small tiles (4.25" x 4.25")
- 4 scraps of coordinating scrapbook paper
- Mod Podge (no more than a small jar)
- clear acrylic spray
- sticky felt squares or circles, or cork sheets
As I mentioned before, I have enough scrapbook paper on hand to wallpaper an entire house; but you can find pages that will coordinate with your own decor at places like Michael's JoAnn Fabrics, Hobby Lobby, Meijer or Target. I chose 4 coordinating sheets of paper and cut a 4" x 4" square out of each.
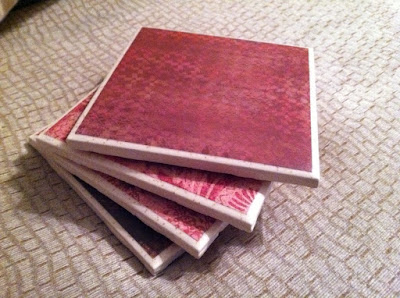
Next, I applied a thin layer of Mod Podge to the front of the tile and pressed each square of paper onto its own tile. Before the glue dried (Mod Podge sets quickly), I made adjustments to the paper, making sure it was centered on the tile with the same amount of tile exposed on each side. Once the paper was firmly glued down, I applied a thin layer of Mod Podge over the top of the entire tile including all four sides. Depending on the look you're going for, another coat or two of Mod Podge might suit you well. I chose to stop at one. It takes about 30 minutes for the glue to dry completely. I let the tiles sit over night before moving on to the next step.
Luckilly, we've had some mild Winter days, so the next step was easy to complete. Outside on the grass, I applied two coats of clear acrylic spray to the top and side surfaces of the tile. It's unnecessary to spray the bottom of the tiles because you'll be gluing felt or cork to them anyway. Wait about 15 minutes after the first coat to apply the next and then another 15 minutes for them to dry completely.
Once the tiles are entirely dry, it's time to apply either felt or cork to the bottom. This helps the coaster slide and eliminates the possibility of scratching the surfaces of your tables. Originally, I purchased a sheet of white felt with adhesive on the back. The felt was down right cheap at $1.17. I cut small squares in half diagonally and applied each triangle to the corners of the tiles. I wasn't happy with the outcome, so I followed the suggestion of my aunt to purchase a roll of cork from Hobby Lobby. This was the perfect solution. I cut the cork into 4" x 4" squares and used super glue to adhere the squares to the back of the tiles. I think over time, the felt would have frayed, and it left the grout lines exposed on the back of the tiles. The cork squares eliminate both of these problems.
Overall, I was very happy with the outcome. This project was extremely simple. I expect to make these in the future for housewarming gifts. Check out the finished product below!
| Hi Sugarplum! |


