Friday, April 5, 2013

Serious Upcycle: Ceiling Fan Update & DIY Mercury Glass

Bada bing, bada boom. That cliched expression pretty much sums up how I feel about what I accomplished with $14.04 and 2 hours of my life. Here we go.

The dreaded ceiling fan. So practical. So windy. So aesthetically displeasing. Especially this one, circa 1992 (or so). I didn't really want to remove the fan altogether and replace it with something else. For one thing, it would most likely have been pricey. For another, I might not have liked it too much in the end. So, for the last few days, I've been pondering ways to transform this monster into something prettier. Should I paint it? I thought about painting stripes or cheverons on the blades. Nope. Too crazy/trendy. I thought about spraying the hardware silver and the blades white. Maybe. Then it hit me: mercury glass!

I've pinned a ton of DIY mercury glass tutorials (my favorite being this one), and I've been meaning to try my hand at the magic. This was the perfect opportunity. Having read on several tutorials that the only place to find Krylon Looking Glass spray paint is Hobby Lobby, I headed straight there. On the way, I continued to ponder about how I would deal with the gold hardware and the blades. While in the spray paint aisle, I decided I'd use Krylon's Brushed Nickel for the hardware and leave the blades as-is for now. I wanted to think about it a bit longer before doing any irreversible damage. I'm known for making rash, impatient decisions. Just ask my mom my husband my sister my cousins my co-workers anyone I've ever met.

There she blows before I began spraying but after I prepped the ceiling. Yikes. I think Rich might have murdered me if he knew I was spray painting inside the house in a room that I just spent three days painting. Spoiler alert: I'm not dead. What Rich doesn't know (until he comes home or reads this) won't kill me. No worries. Carrie @ Dittle Dattle showed me it was okay to use the following method. Yes, if Carrie @ Dittle Dattle told me to jump off a bridge, I would.


Before painting the hardware, I had to remove the blades. Here's where it gets good. After taking the first blade off, I discovered that they were reversible! Super! Who chose to use the lighter side? The dark side is so much better. Check it out!


Once the blades were all down, I donned this mask. Safety first, people. I am Luke's father. That's the second Star Wars reference in 5 sentences, and I've never seen even one of those movies.


After a couple coats of brushed nickel, the motor and hardware came out looking more like this:


Below are the original glass shades. What is the technical term for those things?  As you can see, they are bumpy. Anyone who knows me knows I detest bumps. Let's not talk about it.
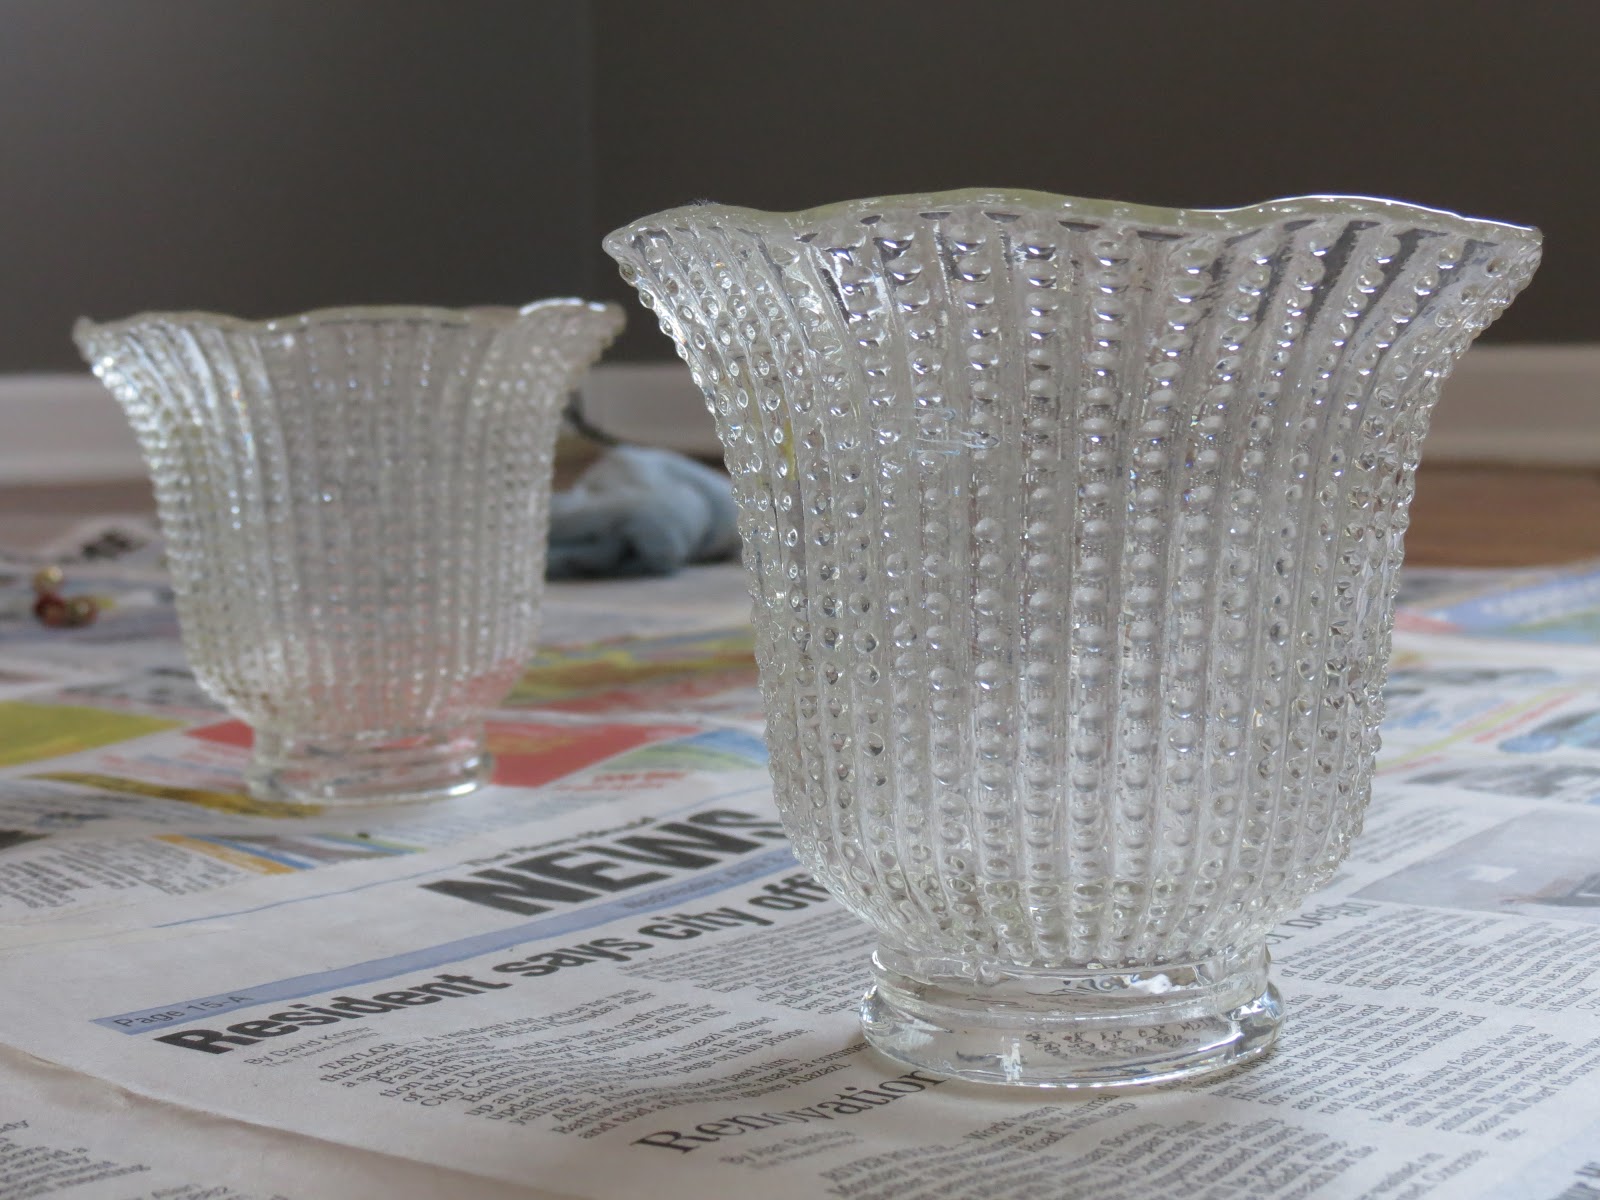

To achieve the desired effect, I sprayed the inside of the shades with a couple thin coats of the looking glass spray. Some of the tutorials I read suggested several coats (up to 5 or 6), but I went with 2 because since it's a light fixture, I wanted to maintain the opacity.


After applying 2 thin coats, I sprayed the painted surface with a 50/50 mixture of white vinegar and water. I let that sit for about a minute then  dabbed with a paper towel moistened with the same vinegar/water mixture.


While wiping, my fingerprints created this masterpiece. He looks happy
about the result, no?
Here's a shot of what it should look like after you've dabbed and wiped. As always, the photo doesn't do it justice. You'll have to try it out and see for yourself!


I could hardly wait to see the final results after replacing the blades on the reverse side. I ripped the newspaper off the ceiling, jumped off the ladder, and scoped out my upcycled ceiling fan. Behold:


It's so much easier this way:

Before


After
So what do you think? Are you as thrilled about this upgrade as I am? At the very least, I dusted the fan blades. At the very best, I got a new fan for $14.04.

P.S. If you enjoy reading my blog, please follow me by clicking "Join this site" and/or entering your email address over to the right of the page. If you want to see what projects I have worked on or plan on working on in the future, follow me on Pinterest by clicking the link to the right! If you like it, pin it!

I'm linked up with:
The Shabby Nest
Jennifer Rizzo
Simple Home Life
Craftionary
The Trendy Treehouse
Tidy Mom
My Romantic Home
Chic on a Shoestring
Beyond the Picket Fence
Fireflies and Jellybeans

craftionary


Greystone for LIFE!

After a long haitus, I'm back and better than ever just as busy. It's just that I'm on Spring recess from work and I've had some uninterrupted time to spend with my house. Let me just confirm: It's been glorious.

It's becomming a tradition to begin a decorating project whilst on Spring break. I'm in the middle of two masters programs and nearing the end of a hectic school year, so needless to say, I've had very little time for any decorating --  let alone blogging. Beginning a new project was just the break I needed. At any rate, I prepped for my week-long break from school by getting my behind to Campbell's Paint and Wallpaper in Dearborn to pick out my paint.

This is what I started with: 3 walls of light to medium blue with 1 wall of medium to dark blue thrown in for good measure, stained trim to match the harwood floors, and a sweet ceiling fan.


Oh yeah, and almost-floor-to-ceiling mirrored closet doors. I can't get away from mirrors in this house. They're the reasons we bought this house. 4 reasons to be exact. What can I say? We're vain people.


I'm still on the grey train. I think it's partly because I've attempted two shades of the color (here and here) and both times, it came out looking very blue. I realize that's a risk you take when painting with as crazy a color as grey, but sheesh. I was bound and determined to perfect the paint-picking process. So I did. Yep, that's right. This color is perfect. Lots of self-love goin' on in this post.

The color I chose is called Greystone by none other than Mr. Benjamin Moore himself. I like. 


The picture above is a bit dark, but you can see how it downplays the orangeyness of the floors.

Oh, and I painted the trim Mountain Peak White (also by BM and the same color as the trim in the two other rooms I've tackled). Doesn't the white trim make the color even yummier? I think so. Except I wouldn't want to eat paint as it probably wouldn't be good for my health.

I will, of course, be adding window treatments, but check out how much better the windows look with the white trim. Mmm hmm.


I love that the color has the quality of taupe. It reminds me of the clay I used back in high school to make the vase that my mom "accidentally broke" the day after I brought it home. Okay, that never happened, but you get the point. I love me some Greystone. 


Thus begins another adventure in decorating. Stay tuned for the reveal of my big plans for that sweet fan. And of course, stay tuned for the styling ordeal. I'm anticipating at least a few weeks worth of work. At least.

In keeping with tradition, color me happy. :)

P.S. Check out Campbell's Paint and Wallpaper in Dearborn, MI for all your paint, wallpaper and framing needs. They offer the best color advice and customer service in Metro-Detroit. They have a full line of stains and tools including Benjamin Moore and Pratt & Lambertt paints. They guarantee their paint and stain color matching, offer in-home color consultations, and service custom picture framing using expert design & workmanship (their every day prices beat Michael's 50% off price). They also offer a large wallcovering library.

P.P.S. If you enjoy reading my blog, please follow me by clicking "Join this site" and/or entering your email address over to the right of the page. If you want to see what projects I have worked on or plan on working on in the future, follow me on Pinterest by clicking the link to the right!

Sunday, January 20, 2013

Photo-a-Day Project 2013 Update

As 2013 began, I joined a challenge that asks its participants to take one snapshot per day. The rules are there ain't no rules. (Think Danny Zuko vs. Leo on Thunder Road.) Because of this, I have taken the liberty to take a few days off (oops) and have snapped some really crappy photos. Thus far, I'm a long way away from achieving my goal of thinking outside the box a bit when it comes to photography and getting better at taking pictures in general.

While I'm not proud of the results, here's what's gone down since last we met:


I took one last look at the magic that is Christmas,


bought and consumed many, many, many clementines,
read and enjoyed Gone Girl by Gillian Flynn,
did some last minute laundry on the final day of Christmas vacation (and whined about it),
caught my husband leaving clutter around in a just-cleaned house,
celebrated a National Championship victory for the University of Alabama (Roll Tide),

worked my buns off grading papers for the final push before final exams,
bought a couple new books with a gift card,
and played "Name the FANBOYS" with Rich.

So far, it's  been quite a poor showing from yours truly. I got a new camera for Christmas last year, so I really need to use my resources more wisely.

Is anyone else participating in a similar Photo-a-Day challenge?

P.S. If you enjoy reading my blog, please follow me by clicking "Join this site" and/or entering your email address over to the right of the page. If you want to see what projects I have worked on or plan on working on in the future, follow me on Pinterest by clicking the link to the right. If you like it, pin it!

P.P.S. My mom is now hosting her own blog! She's documenting her first ever kitchen makeover at Kitchen Nightmares to Kitchen Daydreams. Check it out! As a bonus, she is also the proud owner of a new smart phone. What the? A blog and a smart phone all in one year? That's just crazy.


Wednesday, January 2, 2013

Photo-a-Day Project 2013

Just in the nick of time, Jane Lopez, my Creative Memories consultant invited me to join a photo-a-day challenge for 2013. The challenge is simple: take at least one photo a day for the next 365 days. The reason? Many of us get lost in a sea of photos taken at special occasions like Christmas and birthdays, but have few photos to document the memories we're making on a daily basis.

For me, the Photo-a-Day Project is a challenge to become just a slightly better photographer. I doubt I'll ever find myself taking as wonderful photos as Carrie or Marilena, but practice makes...potentially better. Admittedly, this project is also a little about scrapbooking. Way back when, I promised myself I would take more photos at "regular" events and on average days so I could chronicle our life in genuine way. Yeah, that didn't happen. In fact, I've only scrapbooked once in the last several months. Granted, it has more to do with my busy work schedule than with a lack of motivation, but still. After scrapbooking the other day, I came away with 12 glorious pages of...Christmas. Old habits die hard.

So when I got the email inviting me to participate in the Photo-a-Day Project, I jumped on board. I'm allowing myself a little leeway. (If I forget or miss a day, the world will end even less than it ended on December 21, 2012.) I'm hoping, though, that when December 31, 2013 rolls around, I'll have a wealth of memories to share and a big fat scrapbook album to finish.

Without further ado, here's my first photo of 2013:


On January 1, 2013, a couple friends joined Rich & I for a rousing game
of Trivial Pursuit - Master Edition. The girls, of course, came away victorious.
 
Will you join me in the Photo-a-Day project this year? If you do, consider posting your photos to my Facebook wall and leaving a comment with your link on the blog. I'm thinking I'll be back about once per week with a photo round-up.
 
P.S. If you enjoy reading my blog, please follow me by clicking "Join this site" and/or entering your email address over to the right of the page. If you want to see what projects I have worked on or plan on working on in the future, follow me on Pinterest by clicking the link to the right! If you like it, pin it!

Monday, November 26, 2012

(Cup)cake Pops!

Last November, I decided to try my hand at creating some pretty awesome birthday treats for my mom. Behold cake pops:


As you can see, they didn't really turn out super spectacular. It was my first try, though, and I was tickled at the result. This November, I tried a variation of the little cuties: cupcake pops! I didn't take too many process pictures because it's sort of messy. Plus, I took some decent ones last time.

To get the birthday party poppin', you'll need:

  • A regular cake mix (any brand; flavor of your choosing)
  • 1 can of frosting (any brand; flavor of your choosing)
  • Candy chocolate for dipping (milk & white)
  • Sprinkles (or other small decorations)
  • Sucker sticks (found at Michael's or JoAnn's)
  • Small flower-shaped cookie cutter

  • 
    This is an old picture. This time, instead of Candy Dips, I
    used Kroger brand baker's chocolate (milk and white for dying).

    Here's how it works:
    First, you bake a cake. I went with chocolate since it's Mom's favorite.


    Let the cake cool completely. I baked the cake a day ahead of time, but covered it so it would stay moist.

    Next, crumble the cake into tiny pieces. One website suggested you put the pieces into a food processor, but I just used my hands.

    For the next step, I used my Kitchenaid stand mixer, but a hand mixer would work, you need not use a mixer at all. Last year, I used one, but it wasn't really necessary. In fact, it was just annoying. I used my God-given tools this time around and it was way more fun.

    Add about 1/2 - 3/4 of a can of store bought frosting to the crumbled cake pieces. It's important not to use too much frosting, or your pops might fall off the stick! For this project, I used chocolate frosting. You can use any combination of cake and frosting.

     
    Mix well until you get the consistency of Play-Doh. Unfortunately, I don't know where I originally found that tip, but it's the best tip I could pass along. We all know what Play-Doh feels like, right? I woud have added the entire can of frosting if I didn't know any better.

    Next, cover the cake dough with plastic wrap and chill. I left it in the refrigerator for about an hour fifteen minutes.

     
    Prepare a cookie sheet by placing a sheet of wax paper on top. Once your dough is sufficiently chilled, bring it out of the refrigerator and remove the plastic wrap. Next, mold the cake pops.
    For cupcake pops, use a small (about the size of a half dollar) cookie cutter in the shape of a simple flower to mimic the shape of the bottom of a cupcake. Because I'm a turd, I don't have any pictures of this. You want to grab quite a bit (that's a precise measurement, you know) of dough and press it through the bottom of the cookie cutter. I used the bottom of my hand or the counter to level it off on the bottom. Then, just mold the top until you have what you think looks like a sufficient muffin cupcake top. Once you complete a couple, you'll surely get the hang of it.
     
    Next, melt a good amount (again, you must be very precise) of milk chocolate. Holding the pop from the mounded top, dip only the bottom in the milk chocolate. Stick one sucker stick into the bottom of each dipped pop. As you complete this step, place each pop top side down onto the prepared cookie sheet. As it dries, the chocolate will act as glue and should hold the pop firmly in place.
     
    Once each stick is popped, melt a good amount of white chocolate. Using food coloring, die the white chocolate any color. I chose pink because it just seemed right. Prepare a plate with a sprinkling of sprinkles. Picking the pop up by the stick, dip each of the cupcake tops in the colored chocolate. Immediately after dipping, roll the top of the pop in the sprinkles. (Check it out: Last time, I chilled the pops before dipping them into chocolate. I'm pretty sure it was another tip I found online that turned out to be not-so-awesome. I thought chilling the pops would prevent them from falling off the stick when dipping, but it caused the chocolate to harden so quickly that I couldn't decorate them with sprinkles. Having done it both ways, I'll never chill them before dipping again.)
     
    Finally, you'll need a way to display the precious little bites. I picked up a rectangular piece of floral foam from Michaels, wrapped it, and stuck the pops in. Next time, I think a tiered display is in order.
     
    Voila! Cupcake pops! Cute, right?!


    This recipe yields about 30 cupcake pops. I only made 20, so I saved the
    extra dough. I'll let you know how it holds up after being defrosted!
     
    Most other cupcake pops I've seen have been finished off by an M&M. I have to say, it's super cute. I just didn't want to spend the extra 75 cents. Or I was too lazy. Probably the latter.

    P.S. If you enjoy reading my blog, please follow me by clicking "Join this site" and/or entering your email address over to the right of the page. If you want to see what projects I have worked on or plan on working on in the future, follow me on Pinterest by clicking the link to the right! If you like it, pin it!

    Monday, October 29, 2012

    DIY Mason Jar Soap Pump & Various Other Pinteresting Projects

    Last week, Sherry @ Young House Love and Katie @ Bower Power, announced the Pinterest Challenge: Fall Edition. Caught off guard, and not feeling super pinspired by anything at all, I posted about a few things that I was diggin' at the time. I'm still diggin' all that stuff, but my crafting took a sharp turn when I realized that I just didn't have the time to take on anything super involved.

    I'm not currently in the middle of a huge room redo (although I'd like to be), so my brain wasn't on that wavelength. I'm all about not having random stuff around that I just don't need, so I was hard-pressed to find something I'd pinned that would add to the efficiency of our home while not adding to the clutter I despise. After looking for a while, I landed on a DIY soap dispenser using a mason jar and a recycled pump. I first came across the sweet little craft here and pinned it here.

    To gather my supplies, I ran to Michael's and grabbed a few mason jars for $1.29 each. I didn't get to use a 50% off coupon becuase I used one on another item; but at $1.29, it certainly didn't break the bank. Plus, I have some gift card credit left over from my birthday, so realistically, it didn't cost me a penny! Then, I ran into Walmart for some liquid foaming soap. According to The Frugal Homemaker, you can create liquid foaming soap by dispensing about an inch of regular soap into the bottom of your jar, adding water the rest of the way, and shaking to mix; but I wanted to make sure this would work the first time around, so I decided that I'll experiment when I run out of the store-bought version. Since I was already there, I opted to purchase a couple bottles of the soap with the foaming pump. I knew I had one at home that I could recycle, but at $1.57 a pop, I figured I'd splurge. I decided to make one for the upstairs bathroom, one for the kitchen sink, and one for my cousin, Tara, who has been desperately seeking a pretty version of a liquid foaming soap dispenser.

     
    From this point on, Rich pretty much took over. First, he drilled a hole in the middle of the lid.
     
     
    Then, using wire strippers, he bent the metal back until the hole was large enough to fit the pump. I was pretty surprised to find out that the foaming soap pumps are pretty big.


     Then, he added the liquid foaming soap.


    After adding putting the pieces back together, the new soap dispenser was ready to go!


    The Frugal Homemaker painted the lid and pump in her version. I opted to leave mine silver and white. For one thing, it coordinates well enough in my bathroom. For another, I didn't want to spend the money on spray paint. Finally, after a couple days of use, her pump started to chip. I don't do chipping. When things that I've spray painted start to chip, I go all Regan MacNeil on my husband.


    I may try to spray paint the lid and pump in the future with a spray paint meant for plastic. Time will tell. For now, I'm enjoying my little craft. I also like how the soap I chose coordinates with other accents in the bathroom. That was mostly an accident.

    In some ways, I feel like I cheated. The craft was so dang easy, Rich completed most of it, and I've tackled much harder things in the past. It's really just meant to be fun, though. I'm happy I did it. Plus, I also tried a recipe I pinned a while ago too: crock pot pork chops!


    The recipe was super easy. You need 3 (yes, 3!) ingredients: 4-6 pork chops (I used 4), 1 can of cream of mushroom soup, and 1 package of dry ranch seasoning. Add the chops to the bottom of the crock pot, sprinkle the dry ranch over the chops, cover with cream of mushroom soup. Cook on low for 6 hours. That's it! I meant to grab some egg noodles at the store, but I forgot. Instead, I served it with whole wheat rotini that I already had in my cupboard. Rice would work too. The recipe provides you with enough gravy to use it for the noodles or rice. Truth be told, I'm not much of a pork fan, and the recipe doesn't sound all that fabulous; but it was delicious and easy. Bonus: Rich loved it too! I will definitely make it again!

    What do you think? Is anyone inspired enough to make their own DIY mason jar soap dispenser? How about an easy crock pot pork chop recipe? Go for it!

    P.S. Each season, via Facebook, I recruit my friends to join me in the Pinterest Challenges. Many of them don't have a blog, and most of the time, no one else shows any interest. This time, though, my friend, Kim, participated in the only way she knows how: baking! Here's a little collage she whipped up to feature her spooky creations:

     
    According to her, she was inspired by those edible knives you see in the cuipcakes. Her and my sister came across them at JoAnn Fabrics and thought they'd be perfect in a dessert Kim would make for a Halloween party they were going to. Not having a Pinterest account or a blog, Kim has dubbed this the "She's Crafty" challenge.
     
    So that's it. The Fall edition of the Pinterest Challenge is officially over! I'd love to know what everyone else created! Let me know!
     
    P.P.S. I just finished Sing You Home by Jodi Piccoult. It was great! If anyone is interested, I'd gladly pass it along to you. I'm looking for a couple recommendations on a new book to read. Anyone? Anyone?
     
    P.P.P.S. If you enjoy reading my blog, please follow me by clicking "Join this site" and/or entering your email address over to the right of the page. If you want to see what projects I have worked on or plan on working on in the future, follow me on Pinterest by clicking the link to the right! If you like it, pin it!