The dreaded ceiling fan. So practical. So windy. So aesthetically displeasing. Especially this one, circa 1992 (or so). I didn't really want to remove the fan altogether and replace it with something else. For one thing, it would most likely have been pricey. For another, I might not have liked it too much in the end. So, for the last few days, I've been pondering ways to transform this monster into something prettier. Should I paint it? I thought about painting stripes or cheverons on the blades. Nope. Too crazy/trendy. I thought about spraying the hardware silver and the blades white. Maybe. Then it hit me: mercury glass!
I've pinned a ton of DIY mercury glass tutorials (my favorite being this one), and I've been meaning to try my hand at the magic. This was the perfect opportunity. Having read on several tutorials that the only place to find Krylon Looking Glass spray paint is Hobby Lobby, I headed straight there. On the way, I continued to ponder about how I would deal with the gold hardware and the blades. While in the spray paint aisle, I decided I'd use Krylon's Brushed Nickel for the hardware and leave the blades as-is for now. I wanted to think about it a bit longer before doing any irreversible damage. I'm known for making rash, impatient decisions. Just ask
There she blows before I began spraying but after I prepped the ceiling. Yikes. I think Rich might have murdered me if he knew I was spray painting inside the house in a room that I just spent three days painting. Spoiler alert: I'm not dead. What Rich doesn't know (until he comes home or reads this) won't kill me. No worries. Carrie @ Dittle Dattle showed me it was okay to use the following method. Yes, if Carrie @ Dittle Dattle told me to jump off a bridge, I would.


Before painting the hardware, I had to remove the blades. Here's where it gets good. After taking the first blade off, I discovered that they were reversible! Super! Who chose to use the lighter side? The dark side is so much better. Check it out!

Once the blades were all down, I donned this mask. Safety first, people. I am Luke's father. That's the second Star Wars reference in 5 sentences, and I've never seen even one of those movies.

After a couple coats of brushed nickel, the motor and hardware came out looking more like this:

Below are the original glass shades. What is the technical term for those things? As you can see, they are bumpy. Anyone who knows me knows I detest bumps. Let's not talk about it.
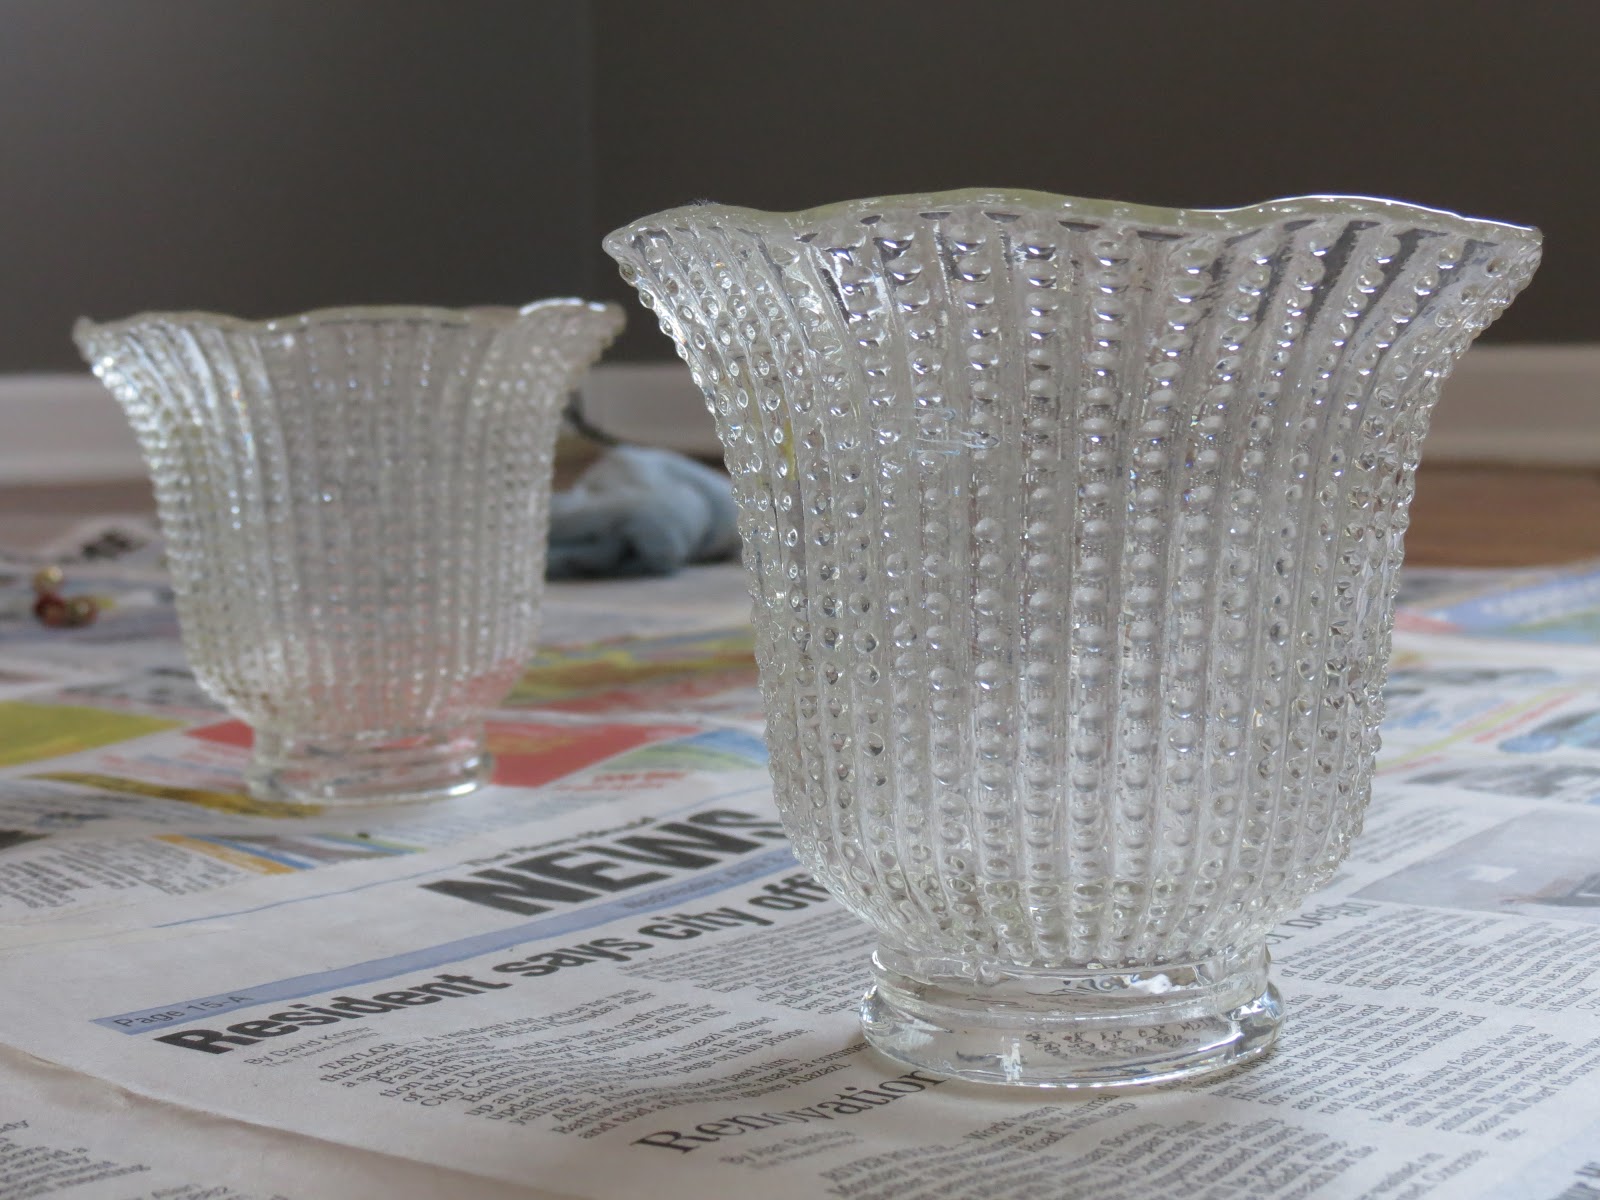
To achieve the desired effect, I sprayed the inside of the shades with a couple thin coats of the looking glass spray. Some of the tutorials I read suggested several coats (up to 5 or 6), but I went with 2 because since it's a light fixture, I wanted to maintain the opacity.

After applying 2 thin coats, I sprayed the painted surface with a 50/50 mixture of white vinegar and water. I let that sit for about a minute then dabbed with a paper towel moistened with the same vinegar/water mixture.

 |
| While wiping, my fingerprints created this masterpiece. He looks happy about the result, no? |


It's so much easier this way:
 |
| Before |
 |
| After |
So what do you think? Are you as thrilled about this upgrade as I am? At the very least, I dusted the fan blades. At the very best, I got a new fan for $14.04.
P.S. If you enjoy reading my blog, please follow me by clicking "Join this site"
and/or entering your email address over to the right of the page. If you want to
see what projects I have worked on or plan on working on in the future, follow
me on Pinterest by clicking the link to the right! If you like it, pin it!
I'm linked up with:
The Shabby Nest
Jennifer Rizzo
Simple Home Life
Craftionary
The Trendy Treehouse
Tidy Mom
My Romantic Home
Chic on a Shoestring
Beyond the Picket Fence
Fireflies and Jellybeans

I'm linked up with:
The Shabby Nest
Jennifer Rizzo
Simple Home Life
Craftionary
The Trendy Treehouse
Tidy Mom
My Romantic Home
Chic on a Shoestring
Beyond the Picket Fence
Fireflies and Jellybeans
Very cool!
ReplyDeleteThank you! :)
DeleteLove every thing about your project, except the size of the light bulbs. You can get much smaller bulbs and I think they would improve the look even more.
DeleteKrafty Katie! This really looks great!
ReplyDeleteThanks! :) I'm on pins & needles waiting for an update from Ellen's Kitchen Do Over! <3 It's not like I can come see it or anything.
ReplyDeleteAwesome upgrade!
ReplyDeleteThank you!! :-)
DeleteNow, this is one awesome thing about some ceiling fans – the blades come in two different colors. The one we have on the patio is like this too, and I always find it fun that a new look for my ceiling fan can come in as handy as flipping its blades to the other side. Back to you; I was as thrilled as you are with the result of your little project, Katie! The mercury glass totally made your ceiling fan look new and expensive. I like it! Staci Severns
ReplyDeleteThanks, Staci! I agree about the blades...I had NO idea they were reversible...I was flabbergasted!! You totally have to try the mercury glass trick...so fun!! Thanks for stopping by and taking the time to comment!
DeleteI like this but it is a very bad idea to spray paint in the house. Even if you put paper behind the fan and use a mask yourself, gravity will make sure your entire floor is covered in little specs of paint dust. Even if you don't see them. If you have children crawling or pets around his is a major safety hazard. Just take it off and take it outside or to the garage.
ReplyDeleteYou're right! Honestly, I didn't even think about the safety hazard. Thanks so much for your input!
ReplyDeleteThe new light looks great! I am so impressed with the transformation!
ReplyDeleteI can give you the address Here you will learn how to do it correctly. Read and write something good.
ReplyDeletebest-ceiling-fans-lights
Very interesting info!Perfect just what I was looking for!
ReplyDeletetop panasonic fans in dubai 2019